In every issue, we share some technical tips for working in mosaic and glass. This time, we cover choosing the right grout colour and photographing glass.

Choosing the right grout colour
By Peter Twining
Choosing the right grout colour for a mosaic is important – it can make or break a piece.
The grout colour you choose depends on how you want your completed work to look and is very much a personal choice. Grey grout is commonly used as it works with most other colours. Typically, darker grouts recede and push tesserae forward, whilst paler grouts can overwhelm and wash colours out of your tesserae.
I choose my grout colour when I’m choosing my tesserae because I can see how they interact with each other. If they don’t work together, change is easier at this point. Creating a couple of small sample mosaic pieces using the same coloured tesserae, and grouting them, can help you decide on the best grout colour to use before you grout your mosaic.
Grouting in multiple colours works extremely well, especially if some areas require close colour matching. This process is not difficult to do but it does depend on the complexity of the piece and takes more time.
There are also specialist grouts such as translucent epoxy grout, which saves grouting in multiple colours. It is recommended for glass and narrower grout lines. Translucent grout is like a frosted glass and reflects the colour of the surrounding glass in the grout lines, as shown in the photograph.

There really isn’t a magical solution to choosing a grout colour but considering grout colour as an integral part of the mosaic, not as an afterthought, will give you far better results.
Watch a video by Peter exploring translucent grout
CONNECT:
YOU CAN FIND LOTS MORE TOP TIPS BY PETER ON HIS TREASURY ROAD YOUTUBE PAGE.
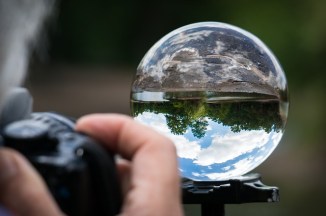
Top tips for photographing glass
Photographing glass is notoriously tricky. So we trawled the internet (so that you don’t have to!) for some top tips about getting the best results possible when photographing your art.
1. Ensure your artwork is spotlessly clean.
2. Ideally, photograph your piece in natural light – outside on a cloudy day. Avoid direct sunlight.
3. If you need to photograph it inside, ensure your piece is lit from the sides – rather than from above – to avoid glare.
4. If your piece contains mirror, consider photographing it with a white card/ceiling above it, to avoid reflections.
5. Don’t use auto flash. Ensure the lighting is right by taking a few test shots (at different times of the day).
6. If you have a camera, use it. But smart phones are also capable of taking great quality shots.
7. Use a tripod if you have one, to avoid any shakiness. Otherwise, try to find a prop to steady your arms/elbows on.
8. If you need to take lots of high-quality photos of your art, consider investing in a light box/tent.